HOA Holiday Lighting: How to Create a Cohesive Look for Your Community
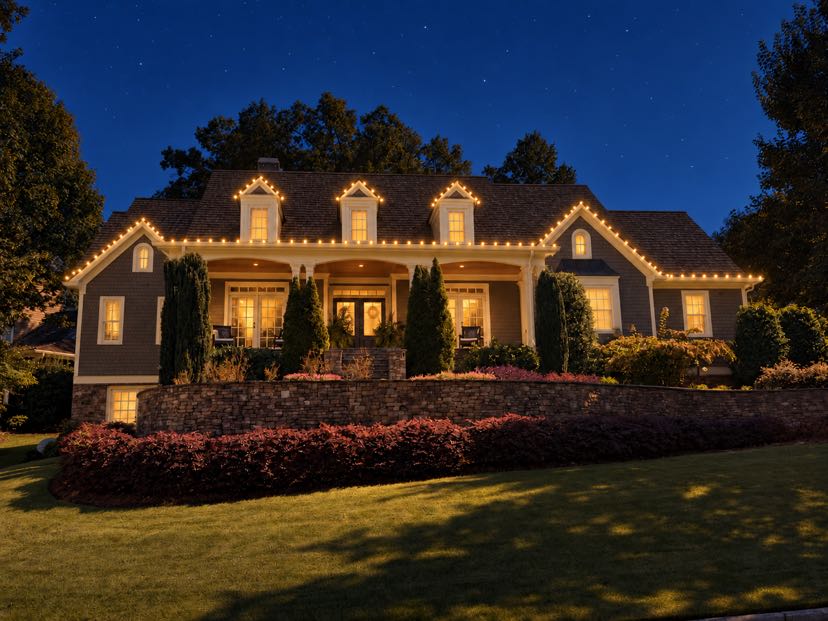
When it comes to HOA holiday lighting installation, the goal is simple: create a festive atmosphere that feels intentional and coordinated, not chaotic. A cohesive holiday look across your Dahlonega community reflects pride in your neighborhood and brings residents together during the season. But achieving that polished appearance takes planning, clear communication, and some practical preparation before the decorating crew arrives.
The difference between a community that looks thoughtfully decorated and one that appears scattered often comes down to decisions made weeks in advance. By preparing now, you'll set your HOA up for success when installation day arrives.
Establish Clear Design Guidelines Before Installation
Start by defining what "cohesive" means for your community. Will you focus on warm white lights, cool white lights, or a mix? Should decorations stick to certain areas like entryways and common spaces, or will individual homes participate too? These decisions prevent conflicting styles and create visual harmony across your property.
Document your choices in a simple guide. Include details like preferred light colors, where decorations should go, how many lights are appropriate for different areas, and whether any decorative styles (like inflatable characters or animated displays) should be limited or avoided. Share this guide with all residents and the installation team well in advance so everyone's on the same page.
If your HOA includes commercial areas or a clubhouse, consistent lighting there sets the tone for the entire community. Professional commercial holiday lighting in Dahlonega, GA can anchor your community's aesthetic while residential areas complement that vision.
Prepare Your Spaces and Identify Key Areas
Walk your community with a checklist and identify exactly where lights will go. Note the entryway signs, common landscaping areas, fence lines, pathways, and any architectural features worth highlighting. Take photos of these areas in daylight so the installation crew can see what they're working with and plan accordingly.
Clear any obstacles before the team arrives. Trim back tree branches that might interfere with light placement, move potted plants or lawn furniture that might be in the way, and make sure pathways are accessible. Check that outdoor outlets are accessible and functioning. If you're decorating mailbox areas or utility boxes, ensure those spots are clear too.
For common areas, decide whether lights will accent landscaping, outline building edges, or frame walkways. Being specific about these decisions saves time during installation and ensures the finished look matches your community's vision.
Communicate Expectations and Timeline With Your Installation Team
Schedule a pre-installation walkthrough or phone call with whoever's managing your HOA holiday lighting installation. Discuss your design guidelines, point out any tricky spots or concerns (like low-hanging wires or delicate plants), and confirm the timeline. Ask about their experience with community-wide projects and whether they'll provide maintenance during the season.
Share the design document you created with the installation team. Clarify where they have flexibility and where precision matters most. If certain areas are highly visible from the street, mention that. If some residents requested specific lighting for their individual properties, communicate those details too.
Agree on how long installation will take and what residents should expect. Will it happen over one day or multiple days? Should people plan to stay home? Will any driveways be blocked? Clear communication prevents confusion and keeps the project running smoothly.
Build Buy-In From Residents Early
A cohesive community look depends on resident participation and support. Send communication about the holiday lighting plans several weeks before installation. Explain the design vision, show sample images of what you're aiming for, and invite feedback or questions.
If individual homes will have lights, set guidelines and deadlines. Will residents handle their own decorating, or will the professional team do it? If residents are participating, remind them of the color and style preferences you've chosen. Consider offering a "how-to" or a list of approved decorating ideas to keep things coordinated.
The more residents understand the plan and feel included in the vision, the more likely they'll embrace the cohesive look you're creating together.
A: Start with a survey to understand preferences, then make decisions based on majority input and your community's character. Having clear, documented guidelines helps everyone understand the reasoning and feel heard, even if not every preference is included.
A: That depends on your HOA rules and community preference. Many Dahlonega HOAs decorate common areas professionally for consistency, then allow residents to add personal touches that complement the overall design. Define this clearly in your guidelines.
A: Aim to finalize your design and book your installation team by late September or early October. This gives you time to communicate with residents, prepare spaces, and ensure the work is done before the holidays arrive.
A: Ask your installation team about their maintenance plan. Many provide periodic check-ins to replace burnt-out bulbs, adjust decorations after weather, or make sure everything stays looking polished throughout the season.
Ready to create a festive, cohesive holiday look for your community? Contact Sting Lighting Solutions, LLC today. We specialize in HOA holiday lighting installation and understand how to bring neighborhoods together with thoughtful, professional decorating. Reach out to discuss your vision.